A person with a severed artery in the thigh can bleed to death in about the time it takes an ambulance to find your street.
That is the single fact that should reorder how you think about this. In a severe bleed, the responders are not the first line of care. You are. Whatever happens in the first three to five minutes happens because of what someone in the room did with their hands, and the people who save lives in those minutes are rarely the ones with the best kit. They are the ones who already knew the order.
This covers that order: how to recognize bleeding that will kill, the three techniques surgeons teach for stopping it, the old habits you should drop, and the improvised tourniquet trick from the movies that fails far more often than it works.
If This Is Happening Right Now
- Call 911, or point at one person and tell them to call. Then keep going.
- Find where the blood is coming from. Cut or pull clothing away if you have to.
- Life-threatening bleeding from an arm or leg, and you have a tourniquet? Put it on now, 2 to 3 inches above the wound, and tighten until the bleeding stops. Do not spend minutes trying pressure first. If someone is fetching the tourniquet, press hard on the wound while you wait.
- No tourniquet, or the wound is not on a limb? Press hard, directly on it, with both hands and your body weight. Use a cloth if you have one, bare hands if you do not.
- Deep wound in the neck, armpit or groin? Press hard. If you know how, pack gauze or clean cloth into the wound and keep pressing on top.
- Do not let up until professionals take over.
Everything below explains each step. If you are reading this in an emergency, stop here and do it.
How to Tell a Bleed Will Kill
Not every wound that looks bad is dangerous, and some that look manageable are not. The Stop the Bleed program from the American College of Surgeons, which is the standard taught across the United States, lists the signs that mean bleeding is life-threatening:
- Blood spurting out of the wound
- Blood that will not stop flowing
- Blood pooling on the ground
- Clothing soaked through with blood
- Bandages soaked through with blood
- Loss of all or part of an arm or leg
- Bleeding in someone who is now confused or unconscious
Any one of those is enough. You do not need two.
The last item deserves attention because people miss it. Confusion, slurred speech, or a person who suddenly goes quiet and pale is the body telling you it has already lost a dangerous amount of blood. By that point you are behind, not ahead.
You do not need to know whether it is an artery or a vein. People lose time trying to work that out. The amount of blood, whether it keeps coming, and how the person looks are all you need to act.
Which Technique, and When
The three techniques are not a ladder you climb in order. The wound decides which one you reach for first.
Life-threatening bleeding from an arm or leg: tourniquet, as fast as you can get one on. Current first aid guidance treats a commercial tourniquet as the first move here, not the last resort. Press on the wound only while the tourniquet is on its way.
Bleeding from the neck, armpit, groin, or the torso: a tourniquet cannot go there. Firm direct pressure, and packing if you have been taught how.
Everything else: direct pressure. Most bleeding stops with it.
Step One: Direct Pressure
This is the foundation, and it is the right move for most bleeding.
Put a clean cloth over the wound. Gauze is ideal, a t-shirt or towel is fine, and if you have nothing, use your bare hands. Then press straight down with both hands stacked, arms locked, your body weight over the wound. Push harder than feels polite. The Stop the Bleed instruction is literally to push down as hard as you can.
Then hold it. Not for thirty seconds. Until help arrives.
The three mistakes that undo good pressure are all instinctive, which is why they happen:
Lifting to check. Every time you peek, the clot you were building tears loose and you start from zero. Do not look. Keep pressing.
Removing a soaked cloth. Leave the first layer where it is, because pulling it off rips away the clot underneath. Add one more pad on top and press harder, but do not keep stacking. Blood soaking through is the signal that pressure alone is not enough. On an arm or leg, that means tourniquet. Elsewhere, it means packing if you can.
Pressing beside the wound instead of on it. Pressure has to land on the bleeding vessel. If blood keeps coming, move your hands until it stops.
Surgeons have a longer list of the instinctive moves that make bleeding worse instead of better, and it is worth reading before you ever need it, because under stress people do what feels natural, and what feels natural is often wrong.
Step Two: Wound Packing
Pressure on the surface works when the bleeding vessel sits near the surface. For a deep wound, it does not, because you are pressing on skin while the bleeding happens three inches down.
Packing solves that by putting the pressure inside the wound, right on the vessel.
- Expose the wound fully. Cut away clothing.
- Find the source of the bleeding as best you can. Wipe away pooled blood if it hides the opening.
- Push gauze into the wound with your fingers, aiming at the deepest point where blood is coming from. Bleeding control gauze is best, plain gauze works, a clean cloth works if that is all you have.
- Keep feeding it in, packing tight, until the wound is completely full and you cannot fit more.
- Press down hard on the packed wound with both hands and hold.
It will feel wrong. You are pushing material into a person’s body, and it will hurt them. Packing is exactly what trauma teams do, and it is one of the strongest tools you have for wounds where a tourniquet cannot go.
It matters most in the armpit and groin, and on deep wounds of the shoulder, back or scalp. These are areas where large vessels run and where a limb tourniquet cannot reach. The neck is the hardest and most delicate of these, because the airway sits right there.
Be honest with yourself about one thing. Packing is a hands-on skill, and it is taught on training models for a reason. If you have never done it, firm direct pressure is still a real intervention, and it is the right move. Learning to pack is the strongest argument for the hour-long class at the end of this article.
Step Three: The Tourniquet
A tourniquet is for one situation: life-threatening bleeding from an arm or leg. When that is what you are looking at and you have one in reach, it goes on first, not after pressure has failed. Every minute spent pressing on a wound that a tourniquet would have stopped is blood the person does not get back. Used correctly, it is one of the most effective life-saving tools ever put in civilian hands. Military data from the wars in Iraq and Afghanistan changed medical opinion on tourniquets almost entirely, and they are now taught to schoolteachers.
How to apply one:
- Place it 2 to 3 inches above the wound, between the wound and the heart.
- Never over a joint. Not on the elbow or the knee. Go above it.
- If you cannot see exactly where the wound is, in the dark or through thick clothing, place it high on the limb, as close to the body as you can get it.
- Pull the strap as tight as you can by hand.
- Twist the windlass rod until the bleeding stops. Not slows. Stops.
- Lock the rod in its clip.
- Write the time on the tourniquet or on the person’s skin.
Then these rules:
It will hurt badly. The person may beg you to take it off. Expect that, and do not loosen it because of it. But do not use pain to judge whether it is working, because a tourniquet that is too loose hurts as well. There is exactly one sign that it is working: the bleeding has stopped. If blood is still coming, keep twisting.
If bleeding continues, put a second tourniquet directly above the first.
Do not loosen it and do not remove it. That decision belongs to medical professionals. Loosening a tourniquet to “give the limb some blood” restarts the bleeding you just stopped.
Never on the neck, chest, or abdomen. Tourniquets are for limbs only.
Owning a tourniquet is not the same as knowing exactly when to use it and when pressure or packing is the better call. That judgment is the part most people never practice.
The Belt Trick That Gets People Killed
Here is the part that runs against everything you have seen on film.
Someone is bleeding, a hero whips off his belt, cinches it around the leg, and the crisis is over. It is one of the most repeated images in action movies and it is mostly wrong.
A belt is not built to be a tourniquet. It cannot be tightened enough by hand to fully close an artery in a thigh, and the buckle slips under load. Ohio State’s Wexner Medical Center says plainly to avoid improvised tourniquets, because belts and backpack straps are not engineered for it and may not get tight enough or stay tight.
The danger of a tourniquet that is too loose is worse than people expect. It can close the veins while leaving the artery open, so blood keeps pumping into the limb and cannot drain back out. A loose tourniquet can increase bleeding.
The answer is a manufactured tourniquet, and the case for owning one is stronger than any improvised method. Improvising is a last resort, for when no commercial tourniquet exists and the person doing it knows what they are doing. In that case a strip of cloth at least an inch and a half wide, wrapped twice, with a sturdy stick twisted as a windlass and then tied down, has a far better chance than a belt. But a real tourniquet costs less than a tank of gas, and it is the version that works when your hands are shaking.
Two cautions when you buy one. Get a model the military actually uses, the CAT and SOF-T are the common ones. And buy from the manufacturer or an authorized dealer, because counterfeit tourniquets are widely sold online, look nearly identical, and have broken during use.
Two Old Habits to Drop
If you learned first aid decades ago, you may have been taught to raise the bleeding limb above the heart or press on “pressure points” upstream of the wound. Neither is part of the current Stop the Bleed method. They waste the minutes you need for firm direct pressure, packing, or a tourniquet. Use the three steps that work.
Watch for Shock
Stopping the bleeding is not the end of the danger. A person who has lost a lot of blood can slide into shock, where the body can no longer get enough blood to its organs.
Watch for pale or grey skin, skin that feels cold and clammy, fast shallow breathing, a racing weak pulse, confusion, anxiety, or growing drowsiness.
Lay the person flat. Keep them warm with blankets, coats, anything, because a bleeding body loses heat fast and cold makes bleeding worse. Do not give them food or drink. Keep talking to them.
The trouble is that the early signs of shock are the ones most people miss, and by the time someone looks obviously unwell, the window is narrowing.
What Not to Do
- Do not pull out an impaled object. A knife, a shard of glass, a branch. It may be plugging the wound. Pack and press around it and leave it in place.
- Do not wash out a severely bleeding wound. Cleaning comes later.
- Do not put a tourniquet on the neck or torso.
- Do not take off a tourniquet once it is on.
- Do not stop pressing to go find a better bandage. Use what is in your hands.
When Help Is Far Away
Everything above assumes help is coming. On a farm two counties from the nearest trauma center, after a storm has closed the roads, or in any situation where the ambulance is an hour out rather than eight minutes, the job does not end when the bleeding stops.
Now you are managing a wound for hours, possibly days. Whether to close it, how to keep it clean, how to spot infection setting in. That is a different body of knowledge, and much of it is counterintuitive. There are cases where closing a wound is the worst thing you can do, and knowing which ones is the difference between healing and a serious infection.
Build the Kit Before You Need It
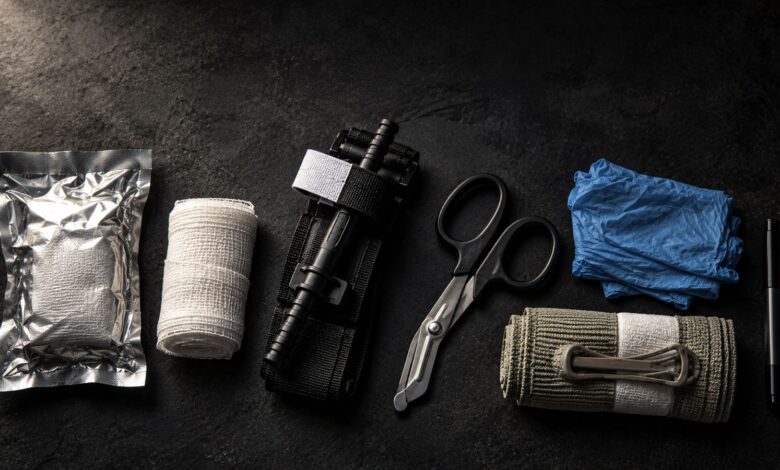
A bleeding control kit is small, cheap, and should live somewhere everyone in the house knows about. The core:
- Two commercial tourniquets, from an authorized seller
- Hemostatic gauze, the kind designed for bleeding control
- Plain compressed gauze for packing
- Pressure bandages
- Trauma shears for cutting away clothing
- Nitrile gloves
- A permanent marker for writing the tourniquet time
Keep one at home and one in each vehicle. The kitchen and the garage are where most serious household cuts happen, so the kit should be reachable from both in seconds.
Most families stop at the kit and never build the rest of the shelf. It is worth taking the time to organize a medical reserve by purpose, so you know what you have, what is missing, and what has expired before the day it matters.
Do This Week
Buy one real tourniquet from an authorized seller and put it where you would grab it in the dark. That one stays sealed. It is your emergency tourniquet, and manufacturers treat it as single use, so it is not for practice.
If you want to practice, and you should, buy a training tourniquet. Manufacturers make dedicated trainers, usually blue, built for exactly that: being put on and taken off over and over. Practice the motions until you can do them without thinking, so the day you need the real one, your hands already know the way.
Then find a Stop the Bleed class near you. They are run by hospitals and fire departments, they are usually free, and they take about an hour. The hands-on part covers exactly the three skills in this article, pressure, packing and tourniquet, on training models. It is the single best thing you can do to be the person who knows what to do first.
And for the moment no class can prepare you for, the night help is not coming and you are on your own, keep a surgeon’s step-by-step emergency flowcharts on the shelf next to the kit.