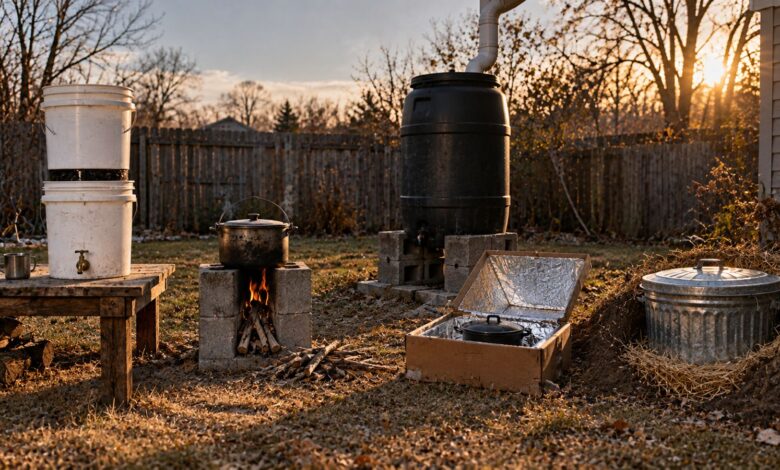
Here is a pattern worth noticing about weekend prepper projects.
The ones people build are the interesting ones. Rocket stoves, Faraday cages, anything involving fire or a drill. The ones that decide how a household actually comes through a long outage are boring, ugly, cost under twenty dollars, and sit unbuilt in a garage because nobody wants to spend a Saturday making a toilet.
These fifteen are ordered by what fails first in a real event, not by what is fun to make. Water, then sanitation, then heat, then food, then everything else. Each one has a full materials list and numbered steps. At the end are four popular builds you should not waste a weekend on.
Start Here If You Only Have One Day
| # | Project | Cost | Time | Priority |
|---|---|---|---|---|
| 1 | Two-bucket water filter | $40 to $70 | 1 hr | Critical |
| 2 | Rain barrel with diverter | $50 to $120 | 2 hr | High |
| 3 | Water storage setup | $30 to $200 | 2 hr | Critical |
| 4 | Twin-bucket toilet | Under $30 | 30 min | Critical |
| 5 | Tippy tap handwashing | Under $10 | 20 min | Critical |
| 6 | Fireless cooker | $0 to $30 | 1 hr | High |
| 7 | Rocket stove | $0 to $40 | 2 hr | High |
| 8 | Thermal window quilts | $20 to $60 | Afternoon | High |
| 9 | Solar oven | $0 to $25 | 2 hr | Medium |
| 10 | Buried root cellar | $30 | 3 hr | Medium |
| 11 | Solar dehydrator | $30 to $60 | Afternoon | Medium |
| 12 | Cold frame | $20 to $80 | Afternoon | Medium |
| 13 | Door reinforcement | $25 | 1 hr | High |
| 14 | Faraday can | $30 | 30 min | Low |
| 15 | Document box | $40 | 2 hr | High |
1. Two-Bucket Gravity Water Filter
Cost $40 to $70 · Time 1 hour · Difficulty Easy
Why it works. Gravity moves the water and the filter element does the actual work. Everything else in this build is a container.
You need
- Two food-grade 5-gallon buckets, one lid
- One ceramic or hollow-fiber filter element rated for pathogen removal, with its washer and nut
- One spigot kit with washers
- Drill and bits sized to your element and spigot instructions
- Dish soap and unscented bleach for sanitizing
Build it
- Wash both buckets with soap, rinse, and sanitize with a bleach solution. Air dry.
- Drill the element hole in the center of the bottom of the top bucket, using the size given in the element instructions.
- Drill the spigot hole in the lower bucket about an inch and a half up from the base, so settled sediment stays below the outlet.
- Fit the element through the top bucket with the gasket on the inside, then the washer and nut underneath. Hand tighten only.
- Install the spigot with a washer on each side and tighten by hand.
- Flush the element with clean water exactly as the manufacturer directs, until it runs clear.
- Stack the top bucket into the lower one, put the lid on top, and run a clean-water test for leaks.
Watch out for
- The buckets do nothing. If the element is not rated for bacteria and protozoa, you have built a container.
- A filter is not a virus barrier. Most gravity elements are built to catch bacteria and protozoa, which are large. Viruses are far smaller and pass straight through. If there is any chance of sewage getting into your source, which is common after flooding or a broken main, filter first to clear the water, then disinfect it by boiling or with an appropriate chemical treatment. Filter plus disinfect, not filter instead of disinfect.
- Buy spare elements now. They have a hard capacity limit and almost nobody stocks replacements.
- Never let it freeze with a wet element inside. Ice cracks ceramic.
2. Rain Barrel With a First-Flush Diverter
Cost $50 to $120 · Time 2 hours · Difficulty Easy
Why it works. The opening gallons of any storm carry everything that landed on your roof since the last rain. A diverter sends that first slug into a separate chamber and dumps it, so the barrel fills with much cleaner water.
You need
- One 55-gallon food-grade barrel
- First-flush diverter kit, or a length of downspout pipe with an end cap and a slow-release valve
- Downspout diverter or elbow
- Spigot and bulkhead fitting
- Overflow hose
- Fine mesh screen
- Four to six cinder blocks
- Drill, hole saw, hacksaw
Build it
- Level a base of cinder blocks where the barrel will sit. Height gives you pressure at the spigot.
- Cut the downspout at the height of the barrel inlet.
- Assemble the first-flush chamber as a vertical pipe with a capped bottom and a slow-release valve.
- Plumb the downspout into the diverter, and the diverter outlet into the barrel inlet.
- Screen the inlet against mosquitoes and debris.
- Install the spigot near the base using the bulkhead fitting, with a washer on each side.
- Fit an overflow port near the top and route the hose away from your foundation.
- After each storm, drain the first-flush chamber so it is ready for the next one.
Watch out for
- Treat this water as non-potable. It is excellent for gardens, flushing, washing, and animals, and that is what it is for.
- Understand which risk you can treat and which you cannot. Boiling, filtering, and chemical disinfection handle the biological side, the bacteria and parasites from bird droppings and debris. They do nothing about the chemical side. Roof runoff can pick up metals from flashing, solder and galvanized gutters, and compounds from asphalt shingles or treated wood. You cannot boil lead out of water. If you do not know what your roof and gutters are made of, do not plan on drinking what comes off them.
- Screen every opening. An unscreened barrel becomes a mosquito nursery in a week.
- Drain and disconnect before a hard freeze.
- Collecting rainwater is legal in all fifty states, but Colorado caps residential collection at 110 gallons, meaning two 55-gallon barrels, rooftop only, for outdoor non-potable use. Utah requires registration above certain volumes. Check your own state before scaling up.
3. A Real Water Storage Setup
Cost $30 to $200 · Time 2 hours · Difficulty Easy
Why it works. The planning figure is one gallon per person per day. Run that for two weeks and a family of four needs 56 gallons, which is roughly a bathtub. That is a build, not a shelf.
You need
- Food-grade containers: 55-gallon barrels, or 5 to 7 gallon jugs if you need to move them
- Unscented liquid household bleach
- Siphon pump or hose
- A pallet or 2×4 rack
- Permanent marker
Build it
- Wash each container with soap and rinse thoroughly.
- Sanitize with one teaspoon of unscented bleach per quart of water. Swirl so the solution touches every interior surface, drain, and air dry.
- Position the rack or pallet first, then set the empty containers on it.
- Fill with treated municipal tap water.
- Write the fill date on each container in marker.
- Store the siphon pump with the barrels, not in a drawer somewhere else.
- Rotate water you bottled yourself every six months.
Watch out for
- A full 55-gallon barrel weighs around 450 pounds. Put it exactly where it is staying before you fill it.
- Never reuse milk jugs. Residual proteins and sugars feed bacteria and cannot be fully washed out.
- You will hear that water must never sit on concrete. Skip that one. Food-grade containers are made so they do not transfer anything into what is inside them, and a cool concrete floor is a decent place for stored water. The pallet is worth having for real reasons: it keeps containers out of any water that floods or seeps across the floor, lets air move underneath, and makes it far easier to see a leak before it becomes a problem.
4. The Twin-Bucket Toilet
Cost Under $30 · Time 30 minutes · Difficulty Easy
Why it works. Urine is largely sterile and is not the hazard. Feces carry the pathogens. Keeping them apart means less total volume, far less odor, and a much simpler disposal problem. The carbon cover material dries the waste and keeps flies off it, and flies are how fecal pathogens reach your food and water.
You need
- Two 5-gallon buckets
- One snap-on toilet seat lid from a camping supplier
- Heavy-duty contractor bags
- A covered bin of cover material: sawdust, wood ash, shredded paper, or unscented cat litter
- A scoop
- Labels or a marker
- Soap and water, or hand sanitizer
- Optional: a privacy screen and a frame to stabilize the bucket
Build it
- Label one bucket PEE and the other POOP, in large letters, before you need it.
- Line the poop bucket with a heavy contractor bag.
- Put two to three inches of cover material in the bottom of the lined bucket.
- Set the snap-on seat on whichever bucket is in use.
- Keep the scoop and the covered bin of material within arm’s reach.
- Cover every use with a full scoop, and keep the lid closed between uses.
- Seal the bag at no more than half full and move it to a covered outdoor bin, away from the house and away from any water source. Half is not caution, it is what makes the bag closable and liftable without a tear, and a bag that splits while you carry it is the worst thing that can happen in this whole system.
- Dilute urine and pour it onto soil well away from the living area and any well or water source.
Watch out for
- The separation is the entire design. Mixing them doubles your volume and creates the smell that makes people stop using it.
- Never put the sealed bags in with household trash and never bury them near a well.
- Build this before you need it. Nobody labels buckets calmly on day three.
5. A Tippy Tap Handwashing Station
Cost Under $10 · Time 20 minutes · Difficulty Easy
Why it works. Hands never touch the container, so the container never becomes the thing spreading contamination. It uses a few ounces per wash instead of a running tap. Twenty seconds with soap and water after every bathroom trip is the strongest barrier there is against fecal-oral transmission, and it only happens consistently if washing is effortless.
You need
- A one-gallon jug with a cap
- Cord or strong string
- Two forked sticks and a crosspiece, or a simple wooden frame
- A short stick for the foot lever
- A nail and a lighter, or a drill with a small bit
- A bar of soap in a mesh bag
Build it
- Drive the forked sticks into the ground and lay the crosspiece across them, or set up your frame.
- Make a small spout hole in the jug just below the cap, using a heated nail or a 1/8 inch bit.
- Punch or drill a hole through the jug handle and run a cord through it.
- Hang the jug from the crosspiece so it pivots freely.
- Tie the lower end of the cord to the foot stick, so pressing down tips the jug.
- Hang the soap from the crosspiece on a second cord.
- Fill the jug, seat the cap loosely, and test. Loosening the cap controls the flow.
Watch out for
- Site one at the toilet and a second at the kitchen. One station means it gets skipped.
- Soap is not optional. Water alone moves pathogens around rather than removing them.
- Keep it in the shade so the water stays drinkable-temperature and the jug does not degrade.
6. The Fireless Cooker
Cost $0 to $30 · Time 1 hour · Difficulty Easy
Why it works. A well-insulated mass loses heat very slowly. Bring a pot to a hard boil and the heat already in it will finish the cooking over several hours, so you pay fuel only for reaching a boil instead of for hours of simmering.
You need
- A cooler, or a wooden box with a lid, roughly twice the volume of your pot
- Wool blankets, old towels, hay, or straw
- A pot with a tight-fitting lid
- Optional: foil-faced insulation board for the base
Build it
- Pick a box about twice the volume of the pot you will use.
- Line the bottom and sides with three to four inches of insulation, packed firmly.
- Shape a nest that holds the pot snugly with no large air gaps around it.
- Make a separate insulated pad to lay over the top of the pot.
- Bring the food to a full rolling boil and hold it there for at least ten minutes.
- Move the covered pot straight into the nest, pack insulation around and over it, and close the box.
- Calibrate it once, before you ever rely on it, and do it without opening the box. Use a probe thermometer with the lead running out through the insulation so you can read it from outside. If you do not have one, run three separate tests with a pot of water instead, opening at two hours on the first, four on the second, six on the third. Do not open the same box three times and call it data, because each opening dumps heat and ruins every reading after it.
- Write down what your box actually did. After that, cook only within the window your own test proved, and leave it closed.
Watch out for
- It must reach a genuine rolling boil before it goes in. This is a heat-retention device, not a heat source.
- Food has to stay above 140°F the whole time it sits. The rule underneath this is simple and it is not negotiable: perishable food that drops below 140°F cannot sit there more than about two hours, total, before it has to be thrown out. This is why the calibration run matters. A well-built box may hold 140°F for six hours and a mediocre one for two, and they look identical from the outside.
- Reheating does not undo it. Some bacteria produce heat-stable toxins that survive a second boil, and rice and other grains are the classic case. If your box dropped below 140°F, boiling the pot again does not make the food safe.
- Given that, use this for beans, grains, and vegetable dishes within your tested window, and do not use it as a holding device for meat, poultry, or dairy unless you can verify the temperature stayed up.
- Once calibrated, do not open it mid-cook. Every look costs you heat and time.
7. A Rocket Stove
Cost $0 to $40 · Time 2 hours · Difficulty Moderate
Why it works. An L-shaped chamber with an insulated burn tunnel creates a strong draft through a small, very hot fire. It burns twigs and scrap efficiently and produces far less smoke than an open fire. You can boil a pot with a handful of sticks.
The ninety-second version. Four concrete blocks with two cavities each. Lay one flat, stand two on it to form an L-shaped channel, cap with the fourth leaving the top open. Feed sticks into the horizontal opening, set the pot on top. That is a working rocket stove.
You need for the can version
- One #10 can, or any clean steel can of similar size that has only ever held food. Never a paint, solvent, fuel or chemical container, including an empty one that looks scrubbed. Residue and interior coatings burn off as fumes you will be standing over.
- Two or three soup cans of matching diameter
- Wood ash, perlite, or vermiculite for insulation
- Tin snips
- Heavy gloves
- Marker and a can opener
Build it
- Trace a soup can on the side of the big can, near the bottom, and cut the hole with snips.
- Make an L from two soup cans: one horizontal feed tube, one vertical riser, joined by cutting tabs and folding them together.
- Slide the L inside the big can so the feed tube exits through the hole you cut.
- Pack wood ash or perlite into all the space around the L. This insulation is what makes it burn hot.
- Cut three tabs on the top rim and bend them inward to hold a pot above the riser with a gap for exhaust.
- Cut a small shelf from scrap to sit inside the feed tube, so air passes underneath the fuel.
Watch out for
- Outdoors only. Always. Not on a covered porch, not in a garage with the door open. This is a combustion device and it produces carbon monoxide, which is what kills people during winter outages.
- Wear gloves. Cut can edges are genuinely dangerous.
- It gets extremely hot. Never on a wooden deck, always on a level non-combustible surface.
8. Thermal Window Quilts
Cost $20 to $60 per window · Time An afternoon · Difficulty Moderate
Why it works. Windows are where most of a room’s heat leaves. The seal matters more than the thickness, because an unsealed panel lets warm air circulate behind it and dump straight into the glass.
You need
- A quilted moving blanket, or batting plus fabric for both faces
- Optional reflective radiant barrier for the middle layer
- Adhesive-backed hook-and-loop tape, or magnetic strip
- A wooden valance board or curtain rod for the top seal
- Staple gun, scissors, needle and thread or a sewing machine
Build it
- Measure the window opening and add two inches on every side for overlap.
- Layer the panel: facing fabric, batting, optional radiant barrier, backing fabric.
- Sew or bind the edges so the layers stay together and the panel hangs flat.
- Fix hook-and-loop tape or magnetic strip to the window frame and the matching edges of the panel, on all four sides.
- Mount a valance or top seal so no air can flow over the top of the panel.
- Roll or fold the panel up during daylight on south-facing windows to get free solar gain.
Watch out for
- Seal all four edges or you have made a curtain, not insulation.
- Expect condensation on the glass behind a well-sealed panel. Air the room daily.
- Do one room properly rather than every room badly. In a heating failure you defend a single space.
9. A Solar Oven
Cost $0 to $25 · Time 2 hours · Difficulty Easy
Why it works. Reflectors concentrate sunlight into an insulated box, and a clear cover traps the heat that builds inside. No fuel at all.
You need
- Two cardboard boxes, one about two inches larger in every dimension
- Aluminum foil
- Black construction paper or flat black paint
- Newspaper for insulation
- A clear oven bag, or a sheet of glass or polycarbonate
- Glue and tape
- A dark, covered cooking pot
- An oven thermometer
Build it
- Nest the smaller box inside the larger one and pack crumpled newspaper into the gap on all sides and the bottom.
- Line the interior of the inner box with foil, shiny side in.
- Lay black paper across the base, or paint it flat black. This is what absorbs the heat.
- Cut a reflector flap from the outer box lid and cover it with foil.
- Fit the clear cover over the opening and seal the edges.
- Prop the reflector at an angle that bounces sun through the cover.
- Preheat for thirty minutes, put food in a dark covered pot, and re-aim the oven every hour as the sun moves.
Watch out for
- It is slow and it only works on clear days. Use a thermometer rather than guessing.
- Not for canning, and not for anything that has to hit a specific safe temperature. That rules out meat, poultry, eggs and dairy, which means most casseroles are off the list too unless you verify the internal temperature with a thermometer before anyone eats.
- Dried red kidney beans are a specific hazard here and almost nobody knows it. Raw kidney beans contain a natural toxin that a hard boil destroys, and guidance is a full rolling boil for at least ten minutes. Slow, gentle heat that never reaches boiling does not destroy it and can leave the beans more toxic than if you had barely cooked them at all. If you want kidney beans, boil them hard on a stove or a rocket stove for ten minutes first, then move them to the solar oven to finish.
- Best for rice, lentils, and already-boiled beans on days you can afford to be patient.
10. A Buried Trash-Can Root Cellar
Cost $30 · Time 3 hours with a shovel · Difficulty Moderate
Why it works. Soil buffers temperature, and the deeper you go the steadier it gets. Deep ground below the frost line sits at a stable 45 to 55°F year round, and a buried can borrows part of that effect at a scale you can dig in an afternoon.
Be realistic about how much of it you are borrowing. A trash can is two to three feet deep, and frost lines run from about two feet in the south to eight feet in the far north, so in much of the country this sits at or above the frost line rather than below it. It will be cooler than your garage and warmer than open air, and it will still swing with the seasons. Put a cheap thermometer inside for the first month and find out what you actually built before you trust a winter’s food to it.
You need
- A galvanized metal trash can with a tight lid
- Shovel
- Gravel
- Damp sand or sawdust for packing
- Straw or leaves for the mound
- A brick or stone to weight the lid
Build it
- Choose a well-drained spot on slightly high ground. Never a low point where water collects.
- Dig a hole the depth of the can, leaving one to two inches of the rim above grade.
- Put three to four inches of gravel in the bottom for drainage.
- Set the can in and backfill firmly around the sides, tamping as you go.
- Pack carrots, beets, and turnips in layers of slightly damp sand or sawdust. These three want the same conditions and store together happily.
- Put the lid on and weight it with a stone.
- Mound straw or leaves over the top, adding more as the weather gets colder.
Watch out for
- Metal, never plastic. Rodents chew through plastic and this is a buried container full of food.
- That rim above grade is what keeps surface water out. Do not bury it flush.
- Keep apples out. The ethylene they give off will age every vegetable around them.
- Potatoes want their own container. They keep best a few degrees warmer than carrots and beets, and stored too cold they turn unpleasantly sweet as their starch converts to sugar. Onions want somewhere different again, drier than any of this. Check what each crop actually needs before you mix them, because one can does not suit everything.
- Check monthly and pull anything soft before it spoils its neighbors.
11. A Solar Dehydrator
Cost $30 to $60 · Time An afternoon · Difficulty Moderate
Why it works. A dark collector heats air, the warm air rises through the drying chamber, and it carries moisture out the top vent. Pull enough water out of food and nothing can live in it.
You need
- Plywood or scrap lumber
- Food-safe screen: stainless steel or food-grade nylon, never aluminum
- Glass or clear polycarbonate for the collector
- Flat black paint
- Screws, hinges
- Insect screen for both vents
Build it
- Build a slanted collector box, paint the inside flat black, and glaze the top with your clear sheet.
- Build the drying chamber above and behind it, with slots or runners for removable trays.
- Cut a low intake vent at the bottom of the collector and a high exhaust vent at the top of the chamber.
- Screen both vents against insects.
- Build trays framed in wood with food-safe mesh stretched across them.
- Face the collector south and set it at an angle roughly matching your latitude.
- Slice fruit thin and to an even thickness so everything finishes at the same time.
- Let the fruit cool completely before it goes anywhere near a container. Warm fruit sealed in a jar makes its own condensation.
- Condition it for about a week before long-term storage. Pack the cooled fruit loosely into sealed jars, filling them around two thirds, and shake them once a day so the pieces separate and the remaining moisture spreads evenly between them.
- Check the glass daily. Any condensation inside means there is still too much water in the fruit, so it goes back on the trays for more drying before you store it.
Watch out for
- This is a fruit dryer. Fruit is acidic and sugary, which is what makes it forgiving of the temperature swings a solar box produces on a real day. Use it in hot, dry, low-humidity weather and it does that job well.
- Never meat. Safe jerky depends on hitting and holding specific internal temperatures, and a solar box cannot reach them reliably or let you verify them. Meat dried this way can look and smell perfectly fine and still make people seriously ill. Jerky belongs in an oven or an electric dehydrator, following a tested method.
- Vegetables are in between. They are low-acid and much less tolerant of a slow, uneven dry, so follow tested dehydration guidance rather than treating them like fruit.
- Never aluminum screen. It reacts with acidic foods.
- Air has to move. A sealed box cooks food instead of drying it.
- Bring trays inside at night or they reabsorb moisture.
12. A Cold Frame
Cost $20 to $80 · Time An afternoon · Difficulty Easy
Why it works. A clear lid over a bottomless box traps solar heat and blocks wind, which typically buys four to six weeks at each end of the growing season.
You need
- An old window, or a sheet of clear polycarbonate
- 2x lumber, or straw bales for a no-build version
- Hinges and screws
- A stick for propping, or an automatic vent opener
- A thermometer
Build it
- Build a bottomless box with the back wall taller than the front, so the lid slopes.
- Site it with the slope facing south for maximum winter sun.
- Hinge the window or sheet to the back wall.
- Set the frame over a prepared bed and bank soil around the outside to seal the base.
- Put a thermometer inside where you can read it without opening the lid.
- Prop the lid open on sunny days once it climbs past the mid-forties, and close it before sunset.
Watch out for
- Overheating kills more cold-frame plants than cold does. Vent it.
- Safety glass or polycarbonate if children are anywhere near it.
13. Door and Window Reinforcement
Cost $25 · Time 1 hour · Difficulty Easy
Why it works. Most forced entries are a single kick, and most doors fail at the jamb because a half-inch screw is holding the strike plate to soft pine trim. Three-inch screws move that load into the wall framing behind it.
You need
- A box of 3-inch wood screws
- One strike plate reinforcement kit per exterior door
- Drill with a pilot bit and driver
- Wooden dowels or cut lumber to fit sliding door and window tracks
- Optional: window pins for double-hung windows
Build it
- Remove the existing screws from the strike plate on each exterior door.
- Pilot-drill and install the reinforcement plate using 3-inch screws driven through the jamb into the stud.
- On every hinge, replace at least one screw on the frame side with a 3-inch screw, so it passes through the jamb and bites into the stud behind it. That is where the strength comes from. Leave the screws on the door side alone unless you know what the door is built from, because a long screw can split a stile or punch straight through a hollow-core door and gains you nothing.
- Cut a dowel or length of lumber to the exact track length of each sliding door and window, and lay it in the track.
- For double-hung windows, drill a downward-angled hole through the inner sash into the outer one and drop in a pin so the sash cannot be raised.
- Close and latch every door you worked on to confirm nothing binds.
Watch out for
- Always pilot-drill. A 3-inch screw driven dry will split the jamb.
- Anything blocking a window or door must be removable in seconds from inside, without a tool. In a fire, your exits matter more than your locks.
14. A Faraday Can
Cost $30 · Time 30 minutes · Difficulty Easy
Why it works. A sealed conductive enclosure shields whatever is inside it from external electromagnetic fields, as long as the contents never touch the metal and the seam is continuous.
You need
- A metal trash can with a tight-fitting metal lid
- Cardboard sheets
- Zip-top bags
- Optional: aluminum tape for the seam
Build it
- Line the bottom and the full height of the walls with cardboard, so nothing inside can touch bare metal.
- Bag each device individually.
- Load the devices in, putting cardboard between layers.
- Lay a cardboard disc on top of everything.
- Seat the metal lid firmly. Tape the seam with aluminum tape if you want a better seal.
What to put in it. A spare radio, a flashlight, a backup battery bank, and a cheap phone.
Watch out for
- Be precise about what this is. It shields contents from external fields. It is not a guarantee against anything, it does nothing for gear that is in use, and it is irrelevant in the overwhelming majority of scenarios you will actually face.
- Build it because it is thirty dollars and half an hour, not because your plan depends on it. If your weekend is short, do projects 1 through 5 instead.
15. The Grab-and-Go Document Box
Cost $40 · Time 2 hours · Difficulty Easy
Why it works. Insurance claims, disaster assistance, and access to your own accounts all run on paperwork. Losing the documents can mean losing the legal claim to the largest asset you own, at the exact moment you need to rebuild.
You need
- A fireproof, waterproof document case or bag
- Plastic sheet protectors
- An encrypted USB drive
- Laminating pouches, or a laminator
- Permanent marker
Build it
- Gather deeds, titles, insurance policies, IDs, birth certificates, vehicle registrations, and prescription records.
- Photograph every room of your house and every valuable item, for insurance purposes.
- Scan everything to an encrypted USB drive and put one copy in the case.
- Sleeve the paper documents in protectors and load the case.
- Laminate a family contact card with your phone numbers, out-of-area contact, and all three meeting places.
- Store the case where you can physically reach it in under thirty seconds.
- Give every family member a copy of the laminated card for a backpack, wallet, and glovebox.
- Review the whole box every August when school starts.
Watch out for
- Never store the only copy of anything in one location. Keep a second set elsewhere.
- A card with a dead phone number on it is worse than no card, because it consumes the attention of somebody who is already frightened.
Four Builds to Skip
The solar still. A pit, a sheet of plastic, a cup in the middle. It appears in every survival list ever written. Field results are dismal, typically well under a cup a day, and you sweat out more moisture digging the hole than you get back. Real water comes from collection, filtration, and boiling.
Any homemade filter without a real element. Sand, gravel, and charcoal in a bottle clarifies water. It does not disinfect it. Water that comes out looking clean and tasting fine can still carry bacteria, viruses, and protozoa. Use it as a pre-filter ahead of boiling or chemical treatment, never as the treatment itself.
Anything that burns, used indoors. Rocket stoves, alcohol stoves, charcoal, generators, grills. Every winter outage produces a cluster of carbon monoxide deaths among people who knew better and were cold enough to do it anyway. Decide now, while you are warm, that this is a line you do not cross.
Homemade pressure vessels and improvised electrical work. Pressure canners, compressed gas, battery banks wired by guesswork. These fail violently rather than gracefully. Buy them tested or leave them alone.
Pick Two and Start Saturday
If you build nothing else this weekend, build the twin-bucket toilet and the tippy tap. Under forty dollars and under an hour for both, and together they address the failure mode that has killed more people in more disasters than everything else on this page combined.
Then build the fireless cooker, because it costs nothing and it will permanently change how you think about fuel.
The rest can wait for the weekend after that. What matters is that the boring ones get built first, because the fun ones always get built eventually.