Water is one of those essentials that most folks take for granted, until it’s gone. For anyone serious about preparedness, finding ways to secure a steady, reliable water supply is non-negotiable. Store-bought cases of water will only last so long, and once shelves are empty, you’re on your own. That’s where building your own DIY rainwater harvesting system makes all the difference. It’s a practical solution for anyone who wants real water independence when the unexpected hits.
This setup isn’t complicated, and it won’t drain your wallet either. With some simple tools and a bit of time, you can put together a system that keeps you covered no matter what comes your way. We’re going to lay out everything you need to build it step by step, no fluff, no guesswork. Just a solid way to collect and store water at home, so you’re prepared long before the next crisis shows up at your doorstep.
What You’ll Need to Build Your System

Before you get started, it’s smart to gather everything you’ll need in advance. Building a dependable DIY rainwater harvesting system requires just a handful of materials, most of which are easy to find at hardware stores or online. At the core, you’re looking at sturdy, food-grade barrels to hold the water, proper piping to connect them, a spigot for easy access, and a strong platform to keep everything stable. Add in a reliable gutter system to catch the rain, and you’ve got the foundation of a self-sufficient setup.
When it comes to choosing your barrels, don’t cut corners. Make sure they’re marked as food-grade and have never stored anything hazardous. Avoid using old chemical containers or barrels of questionable origin, you don’t want leftover toxins leaching into your water supply. Clean, well-maintained equipment is key to keeping your rainwater collection for preppers safe and usable, especially if you’re planning to use the water for more than just gardening or cleaning.
There are also a few smart additions that can take your system up a notch. Overflow valves help manage heavy rains, keeping your barrels from spilling over and causing problems around your home. Basic filters at the intake can block leaves and debris, improving water quality before it even hits the barrel. And if you’re thinking long-term, adding a simple first-flush diverter or inline filtration will make your system that much more reliable as part of your emergency water storage solutions.
Preparing Your Collection Surface
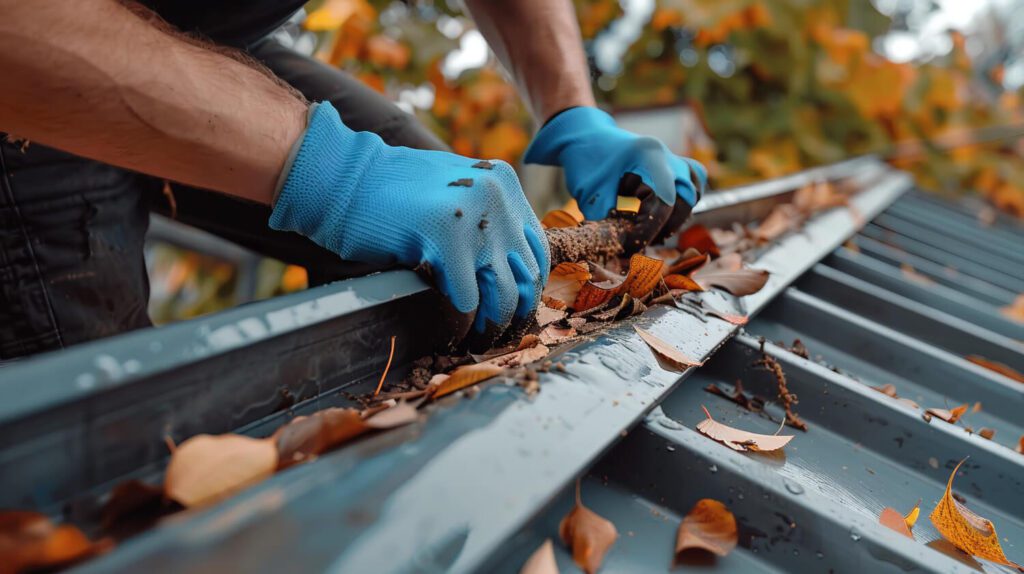
Your barrels and pipes won’t do much good if the water coming in is full of gunk. Before you even think about setting up your DIY rainwater harvesting system, it’s crucial to get your collection surface, usually your roof, in proper shape. Start by giving the roof a solid inspection. Clear off leaves, dirt, bird droppings, and anything else that could contaminate your water. Check your gutters, too. Make sure they’re free of blockages and firmly attached, so the water flows smoothly right where you want it.
Other Article: Survival Guns That Work for Both Defense and Hunting
To keep things cleaner over time, consider adding simple upgrades like gutter guards. They do a great job of stopping larger debris from ever making it into your system. A seasonal rinse with a safe roof cleaner can also help reduce buildup that you might not notice day to day. These small steps go a long way in keeping your collected rainwater cleaner from the start, making your setup safer and more efficient as part of your broader prepping water resources.
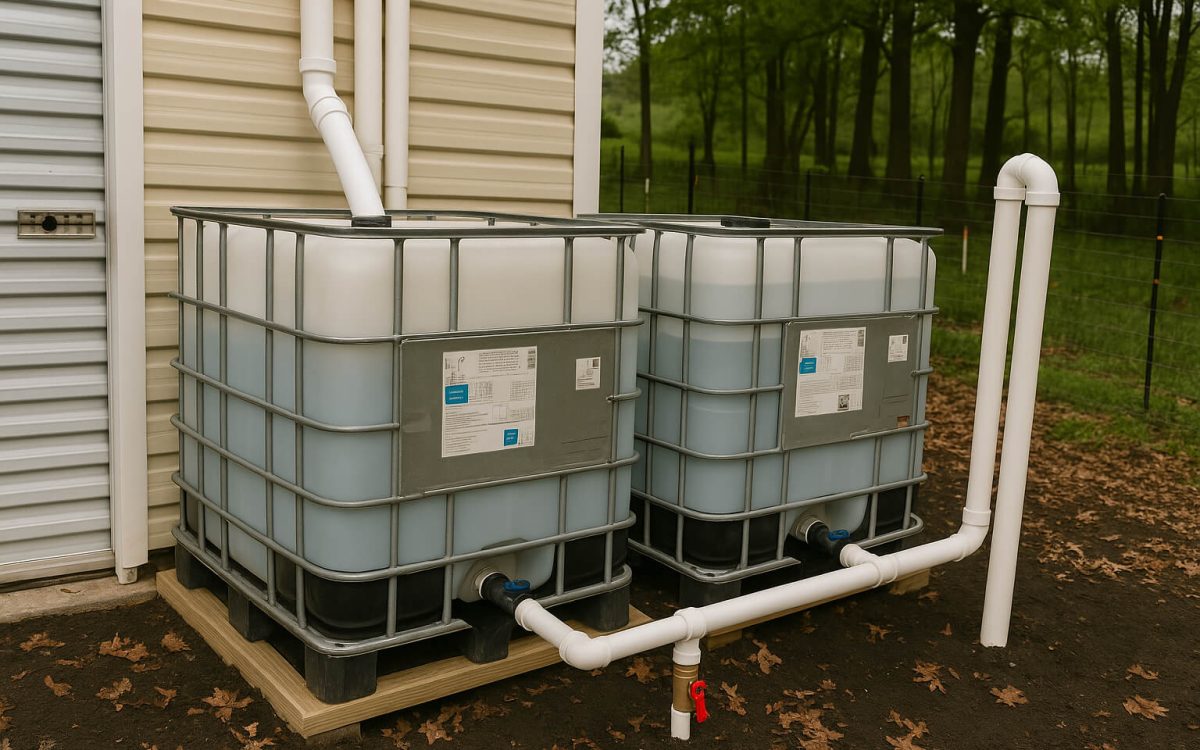
Building the Storage Setup – Step by Step
Now that your collection surface is prepped, it’s time to build the heart of your DIY rainwater harvesting system: the storage setup. Take it step by step, and you’ll have a sturdy, reliable setup that works when you need it most.
Step 1: Build your platform
First things first, you’re going to want a good, solid base for your barrels. Don’t skip this step, it makes all the difference. Raising the barrels off the ground gives you natural water pressure, which is a big help when you’re counting on gravity to push the water through your spigot. You’ve got a couple of good options here: concrete blocks work great, and so does pressure-treated lumber if you’ve got some handy. Either way, make sure your platform is level and strong because once those barrels fill up, they’re going to be heavy, water weighs over eight pounds a gallon. And here’s a bonus: getting the barrels up off the ground also helps keep your water cleaner by keeping it away from dirt, pests, and anything else you don’t want near your supply.
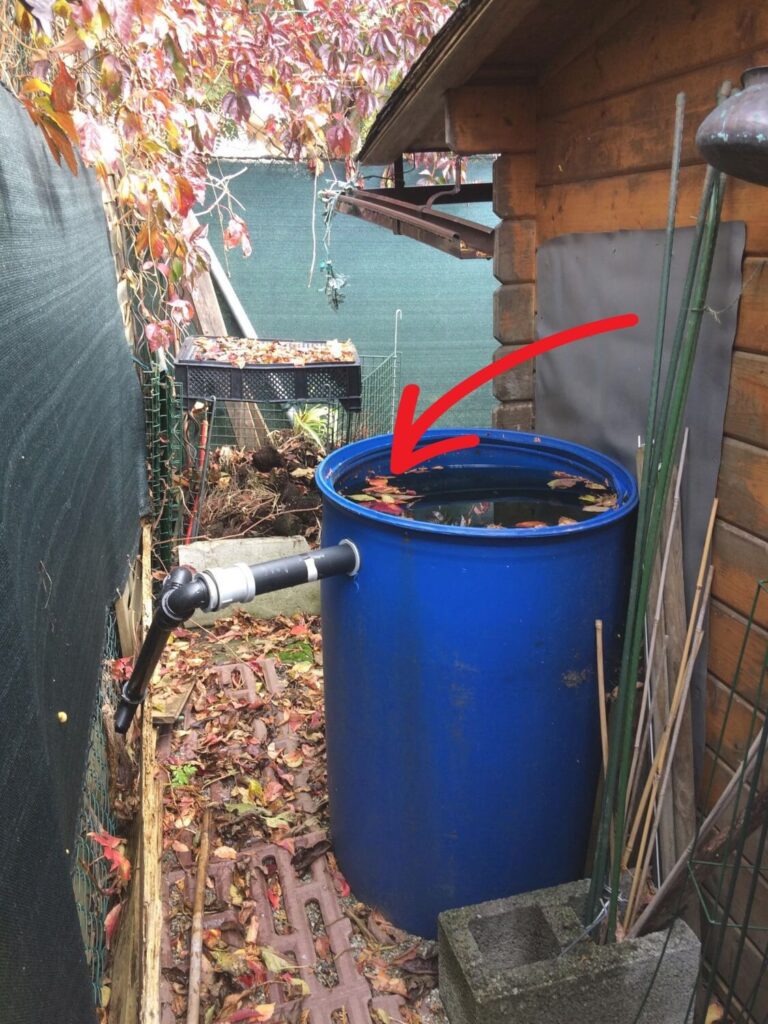
Step 2: Place and secure your barrels
Once your platform is solid, position your barrels with a little breathing room between them. This spacing allows for easy access if you need to clean, inspect, or adjust connections. Make sure they’re lined up so the overflow from one barrel feeds directly into the next. Secure the barrels firmly, especially if you live in a windy area. A shifting barrel can damage your entire setup and compromise your stored water.
Pro tip: If you live in a hot climate, do yourself a favor and paint your barrels with UV-resistant paint. Heat and sunlight wear them down quicker than you’d expect, and that’s how you end up with algae growing inside. A simple coat of paint keeps your water cleaner and helps your barrels hold up for the long haul.
Step 3: Connect the barrels in series
To maximize your storage capacity, link the barrels together using bulkhead fittings and flexible hose or PVC pipe. Install the fittings close to the bottom of each barrel to allow water to flow evenly between them. Use plumber’s tape and a good-quality sealant to prevent leaks, the last thing you want is to lose valuable water because of a poor connection. When done right, this series connection turns a few barrels into one dependable rainwater storage tank system.
Step 4: Install the spigot
Your spigot is your main access point, so place it near the bottom of the final barrel in the series. Drill carefully and use a bulkhead fitting to secure it tightly. A snug, well-sealed spigot ensures smooth flow and saves you from headaches later. Keep in mind, that the lower the spigot, the more water you can use from the barrel, making your system more efficient for everyday use or during survival water harvesting situations.
Step 5: Add an overflow valve
Heavy rains can fill your system fast, and without an overflow valve, you risk water spilling over and damaging your platform or nearby areas. Install an overflow outlet near the top of your last barrel and direct it away from your home’s foundation, ideally into a drainage area or even a secondary barrel if you want to expand your off-grid water system down the road.
Step 6: Test connections and secure everything before use
Before the first rainfall, give your system a thorough check. Fill the barrels partway with hose water and watch for leaks at every connection point. Tighten fittings as needed, reseal any weak spots, and make sure everything feels stable. Better to catch a loose fitting now than to lose gallons of rainwater during a storm.
Step 7 (Optional): Pro upgrades
If you want to go the extra mile, consider adding a water level indicator to monitor your supply at a glance. You can also install a basic inline filter between the barrels and the spigot for an added layer of protection. These small upgrades don’t cost much but make your homemade rainwater collection setup even more reliable, especially if you’re counting on it for long-term use.
Other Article: The Forgotten Amish Techniques That Can Make You Completely Self-Sufficient
Connecting the System and Getting It Working
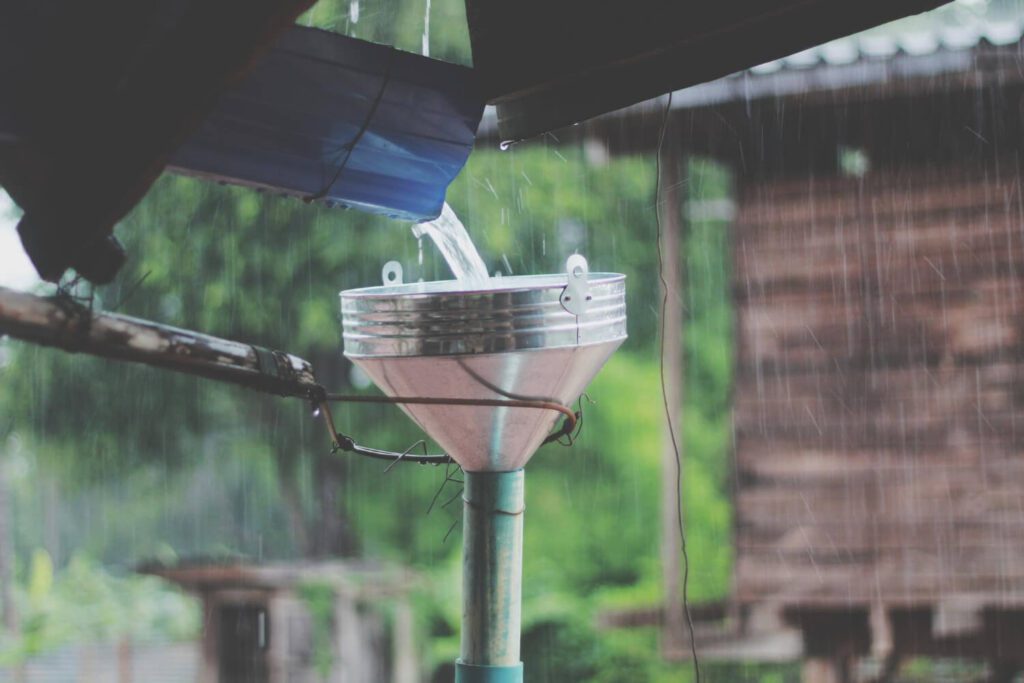
With your storage setup ready, it’s time to bring your DIY rainwater harvesting system to life. Start by directing your roof’s downspout straight into the top of your first barrel. If your existing downspout doesn’t line up perfectly, use an elbow connector or flexible extension to guide the water right where you want it. The cleaner the connection, the smoother your water flow will be. Make sure the opening is covered with a fine mesh screen to keep out large debris and prevent mosquitoes from turning your barrels into a breeding ground.

One smart addition at this stage is the first flush diverter. This simple device sends the first few gallons of dirty rooftop runoff away from your system, keeping your rainwater collection for preppers cleaner from the start. Dust, pollen, bird droppings, all of it tends to wash off in the first flush of rain. Installing this diverter helps protect your water quality right at the source, cutting down on maintenance and improving the overall safety of your supply.
Before you call the job done, run a quick final check. Pour a few gallons of water through the downspout and watch how it moves through the system. Inspect all seals and connections closely to catch any leaks early. Confirm that your overflow valve is working as expected and that your spigot delivers a steady flow. These small tests give you the confidence that, when the skies open up, your system is ready to start collecting without a hitch.
Keeping Your System in Top Shape
Once you’ve got your DIY rainwater harvesting system working, don’t just set it and forget it. It pays to give it a little attention now and then. Every so often, it’s worth taking a few minutes to check for leaves, twigs, or any other junk that might’ve sneaked past your gutter screens. Even small stuff can slow down your flow or make the water dirtier than you’d like. Give your barrels a quick once-over too, especially around the spigot and the connections. Cracks and leaks have a way of creeping up on you if you’re not looking. And every so often, flush out the whole system to clear out any gunk that’s settled at the bottom. It’ll keep your water cleaner and your setup running like it should.
Now, as the seasons change, your system’s going to need a little extra care. Before winter rolls in, make sure to drain those barrels all the way. If water freezes inside, it can crack the plastic, and nobody wants to rebuild a system in the middle of a cold snap. And when you know heavy rains are coming, check that your overflow valve is good to go, so you don’t end up with water spilling everywhere. These quick checkups don’t take much time, but they’ll keep your water self-sufficiency for preppers strong all year long, right when it matters the most.
Other Article: What to Do When Your Home Defense Plan Fails
Now that your DIY rainwater harvesting system is in place, you’ve got something far more valuable than just a few barrels of water, you’ve built real independence with your own hands. This setup gives you the peace of mind that when the grid fails or shelves run empty, you’ll still have a reliable water source to keep your household going strong. It’s a practical, dependable solution that fits right into your prepping plans and keeps you one step ahead, no matter what the skies bring.