A knife isn’t just another tool in your kit, it’s the backbone of self-reliance. With one well-chosen blade you can build shelter, start a fire, prepare food, and, if there’s no other choice, defend yourself. Yet many preppers carry a knife without really knowing how to use it beyond opening boxes. The result? Wasted energy, broken gear, and preventable injuries at the worst possible time.

Mastering a few survival knife skills now means you can rely on your blade when it matters, whether you’re living off-grid for a weekend or weathering long-term disruption. In this guide you’ll learn how to hold and control a knife safely, make feather sticks for quick fire starting, split wood with the batoning method, carve camp notches, keep an edge sharp in the field, treat accidental cuts, and understand the basics of legal self-defense.
These are practical, proven techniques, not flashy tricks, that turn an everyday knife into a real survival asset.
Safety First: Carry, Draw & Sheath Discipline
Before learning fancy cuts or fire-starting tricks, start with the basics: how you carry and handle your survival knife. Good habits here prevent most accidents, and keep your blade ready when you actually need it.
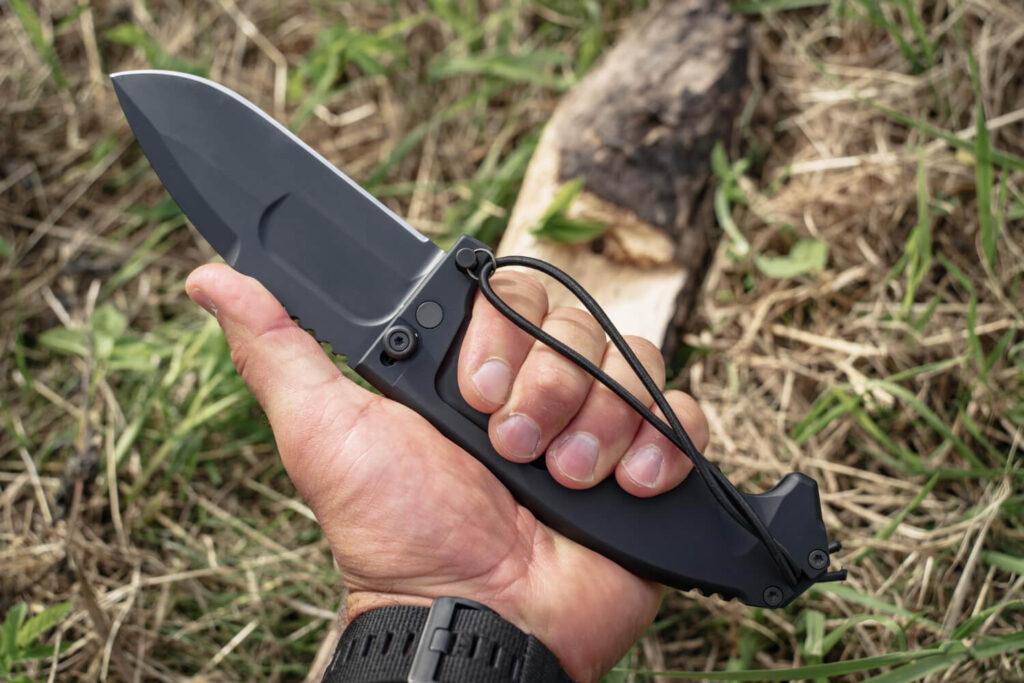
Choose a fixed blade whenever possible – Folders have their place, but a full-tang fixed blade is stronger, easier to clean, and ready the instant you draw it. There’s no hinge to fail and no lock to slip when you’re batoning wood or prying bark for tinder.
Carry it where it’s safe, and reachable –The classic belt sheath at your strong-side hip works for most preppers. Neck knives give quick access but can swing and snag; pack-mounted sheaths keep the blade out of the way but slow your draw. Whatever position you pick, practice reaching for it until it’s smooth and controlled.
Draw and re-sheath with awareness – Keep the cutting edge turned away from your body and anyone nearby. Slow, deliberate movements beat fast, flashy ones. When sheathing, guide the spine (back) of the knife along the edge of the sheath, not the sharp edge toward your fingers.
Know the law before you carry – Blade length limits, concealment rules, and “defensive use” laws vary widely. Check your state or country regulations so your survival knife doesn’t turn into a legal problem.
The 5 Foundational Knife Grips
A survival knife is only as safe and effective as the way you hold it. Master these five knife grips and you’ll handle nearly any camp or field task with control and confidence.
1. Hammer Grip
The classic, fist-wrapped hold, thumb curled over your fingers. Best for power cuts, batoning prep, and rough carving. Keep your wrist straight to avoid strain.
2. Pinch Grip
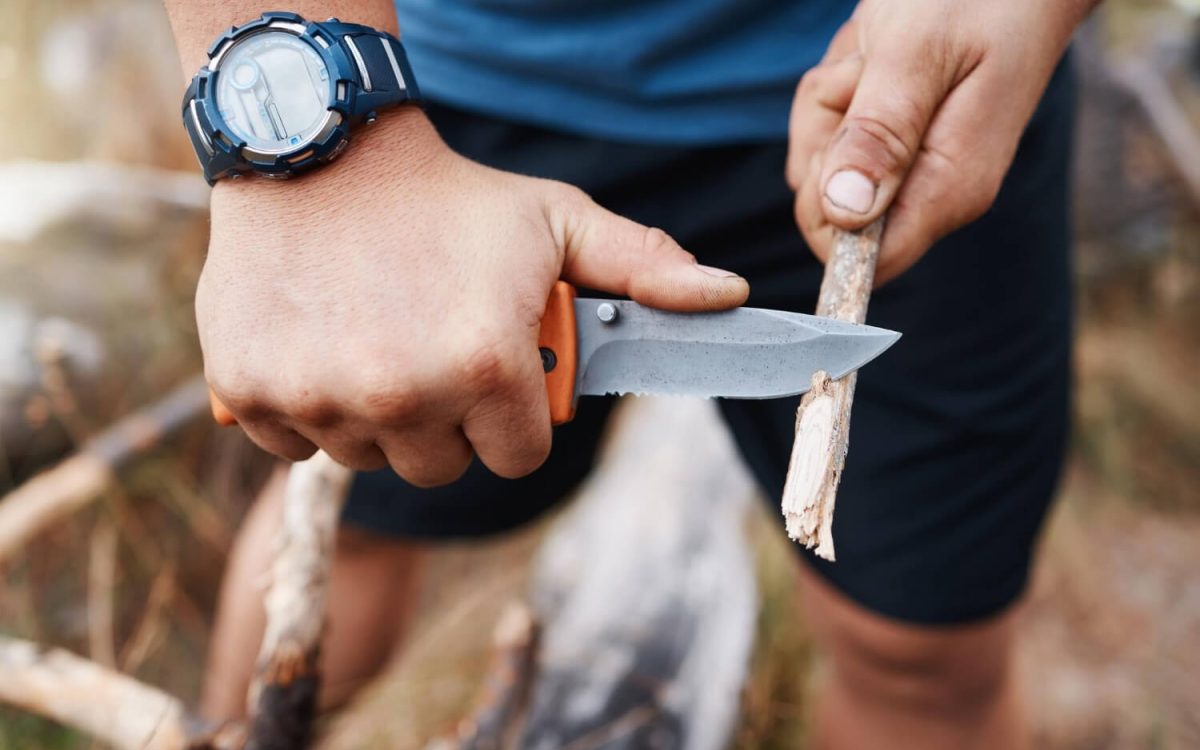
Thumb and index finger pinch the blade’s spine just ahead of the handle, with other fingers around the handle. Ideal for fine carving, feather sticks, and controlled food prep.
3. Chest-Lever Grip
Blade points away from you while the handle rests near your chest. You pull the handle toward yourself using back and shoulder muscles. Great for powerful, controlled cuts on stubborn wood without risking your hands.
4. Knee-Lever Grip
Workpiece braced on your knee, spine of the knife against your thigh, edge away from your body. Lets you slice tough bark or shape stakes with body weight instead of raw arm power.
5. Pull Stroke (Draw Cut)
Blade edge faces you, but the cutting action is a careful draw toward your chest or hip while the spine stays anchored. Use only when you need high control on small material, and keep movements slow and deliberate.
Body mechanics matter: always cut away from your support hand, brace the workpiece against something solid, and keep your off-hand behind the edge path.
Practice drill: Grab a scrap stick and a dull or training knife. Cycle through each grip, make feather curls, shallow notches, and controlled slices. Build muscle memory now before real stress hits.
Fire Prep Fast: How to Make Feather Sticks
When everything’s wet or cold, feather sticks can mean the difference between shivering and having a fire going fast. A few minutes of careful carving gives you tinder that lights with a spark or match even when the wood around you seems damp.
Start with the right wood: Look for dead, dry branches about wrist-thick. If the outer bark feels damp, split the stick to expose the pale, dry heartwood. Avoid rotten, punky wood, it won’t hold curls.
Carve thin curls first, then thicker: Hold the knife in a pinch grip for control. Start near one end of the stick and make long, shallow strokes, creating paper-thin curls that stay attached. Once you have a fluffy base, add a layer of slightly thicker curls above it. This mix catches flame quickly and burns long enough to light bigger kindling.
Common mistakes (and quick fixes):
- Curls breaking off? — lighten your pressure and keep the angle shallow.
- Stick spinning? — brace it against your knee or a stump.
- Blade tearing instead of slicing? — touch up the edge with a quick strop or sharpener.
Practice this skill whenever you camp or train. A few well-made feather sticks can turn damp wood into an easy fire, no lighter fluid, no frustration.
Baton Like a Pro (Without Breaking Your Blade)
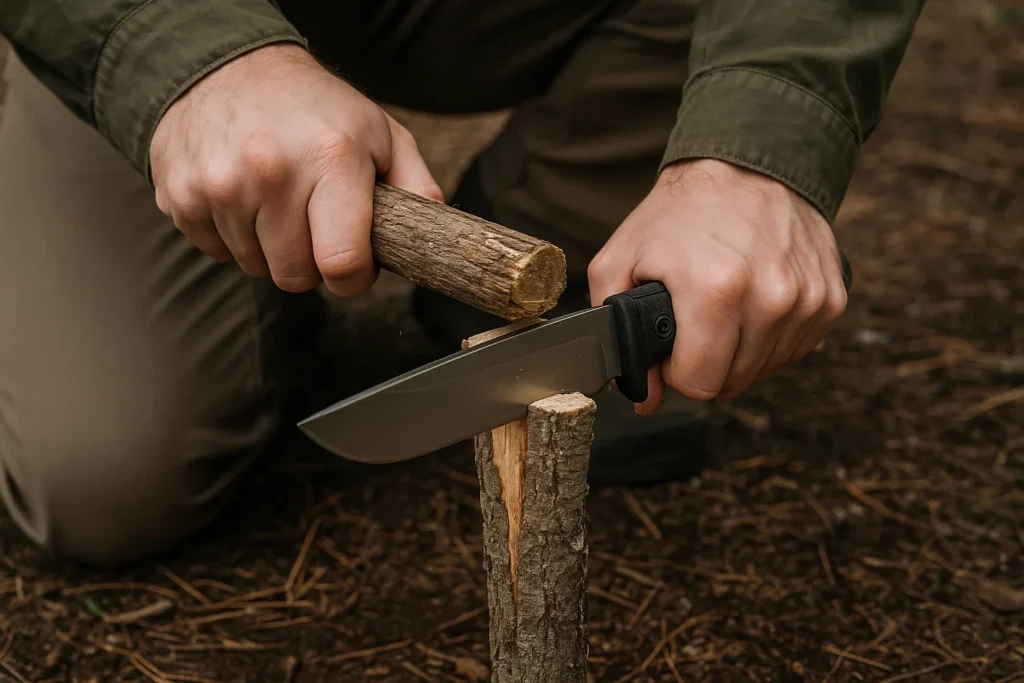
Splitting small logs with a knife, called batoning, is one of the most useful survival knife skills. Done right, it turns wrist-thick wood into fire-ready kindling without an axe. Done wrong, it can snap your blade or cut your hand.
Use the right knife.
Batoning is safe only with a full-tang fixed blade, meaning the steel runs as one solid piece through the handle. Avoid folders or hollow-handle “Rambo” knives; their hinges and weak tangs can fail under impact.
Set up your cut.
Stand the wood on a solid surface. Place the knife’s edge where you want the split and keep the spine (the dull back) facing up. Hold the handle firmly, keeping fingers clear.
Strike with a baton.
Use a heavy stick or chunk of wood, not a rock or metal, to hammer the knife’s spine straight down the grain. Keep strikes firm and controlled. As the split opens, tap the exposed spine or tip to finish.

Avoid the common blade killers:
- Knots or twisted grain (find straighter wood instead).
- Nails, wire, or hidden stones (inspect wood first).
- Twisting or prying once the knife is buried, this snaps tips and tangs.
Know when to stop.
If the log is too thick, knotty, or frozen solid, reach for an axe or saw instead. Batoning saves energy, but not every piece of wood is worth the risk.
Campcraft Carving & Notches
Notches turn sticks into shelter parts and cooking rigs. Learn these four and you can lash, hang, and build fast.
- V-Notch – Simple joint for lashing poles or setting trap triggers.
Cut a straight stop cut, slice in at 45° from each side until a clean V forms.
- Stake Notch – Keeps a guyline from slipping off a tent stake.
Carve a small shoulder and backcut near the top of the stake; round the edges so cord won’t fray.
- Pot Hanger Notch – Holds a pot’s bail on a green stick hook.
Shape the hook, carve a shallow catch behind the beak so the bail stays put.
- Bail / Crossbar Notch – Stops a pot bail or toggle from sliding.
Two short stop cuts a finger apart; scoop a shallow U-seat between them.
Field Knife Sharpening & Edge Care
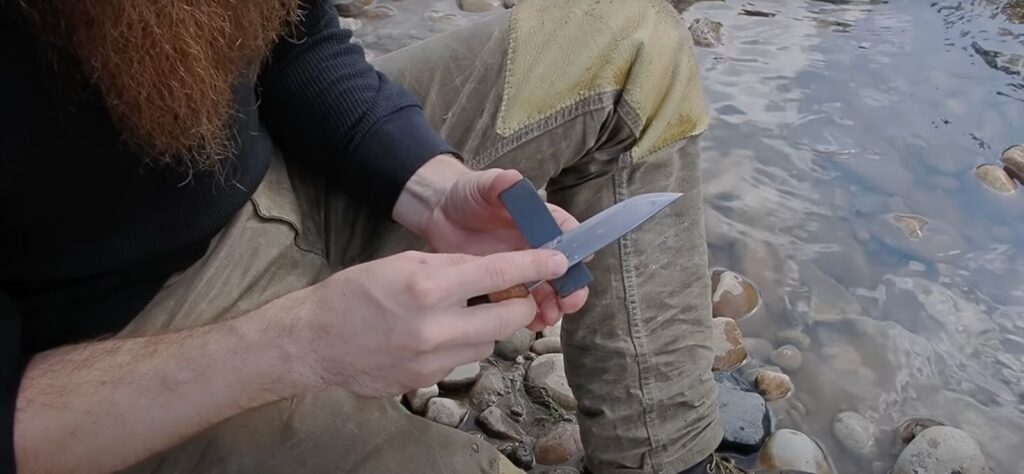
A dull knife is dangerous, it slips, wastes energy, and ruins precision cuts. Keep yours sharp in the field with a few simple habits.
- Hold a steady angle.
Aim for about 20° between blade and stone. Lock your wrist; move from shoulder and elbow for smoother strokes.
- Pack a small sharpener.
Pocket diamond plates, ceramic rods, or guided tools are light and fast. In a pinch, a flat river stone or the back of a leather belt works as a strop.
- Touch up often; save full re-grinds for home.
A few light passes each day keeps an edge keen. Only re-profile a badly chipped blade on a bench stone when you’re back at base.
- Know your steel.
Harder steels hold an edge longer but take more effort to sharpen; softer steels sharpen quickly but need more frequent touch-ups. Choose what fits your skill and patience.
Knife for Last-Resort Self-Defense
Your knife should never be your first answer to danger. Avoidance and distance keep you safer than any blade, and out of legal trouble. Only draw if escape has failed and you face an immediate threat to life.
When you must defend, focus on control and retention. Use a secure hammer or saber grip, keep the knife close to your body, and guard it with your free hand or forearm so it’s harder to grab or knock away. Manage distance: stay just outside an attacker’s reach, use your off-hand or nearby objects to keep space and create an escape lane. The goal isn’t to “win” a knife fight, it’s to break contact and get away.
Learn local knife laws and seek reality-based defensive training (e.g., Pekiti-Tirsia Kali, AMOK!). Avoid dueling fantasies, your knife is a last-ditch lifeline, not a primary weapon.
Myths to Forget: Rambo Knives & Knife Throwing
Hollywood made the hollow-handle “survival” knife famous, but in real life it’s more gimmick than gear. Those big, saw-backed blades often have a weak tang, the steel doesn’t run through the handle, so they snap or loosen under real pressure like batoning or prying. The tiny compass and fishing kit inside the handle won’t save you when the knife itself fails.

Knife throwing looks impressive on screen, too, but it’s a poor survival skill. Once you throw your blade, you’ve lost your only cutting tool and possibly damaged it beyond use. A prepper’s knife is meant to cut, carve, and keep you alive, not to fly through the air.
Invest in a solid, full-tang fixed blade that can handle wood splitting, food prep, and real field abuse. It may not look as flashy, but when your life depends on it, strength and reliability beat movie props every time.
Weekly 30-Minute Knife-Skill Drill
- 5 min — Grips & Draw: practice safe draws and re-sheathing; cycle through hammer, pinch, chest-lever, and knee-lever grips.
- 10 min — Feather Sticks: carve tight, even curls that stay attached; aim for better control each session.
- 10 min — Batoning: split small, wrist-thick rounds without twisting or prying the blade.
- 5 min — Sharpen & Strop: light passes to keep the edge keen and field-ready.
Gear & Training Resources
Choosing the right knife and keeping your skills sharp matters more than flashy marketing. Look for a full-tang fixed blade with a sturdy 4–6 inch drop-point or straight-back blade, a comfortable non-slip handle, and a reliable sheath you can draw from safely. Popular, field-proven examples include knives from ESEE, Morakniv, and KA-BAR Becker, solid steel, no gimmicks, built to baton, carve, and prep food without failing.
For learning and practice, seek out reputable bushcraft voices rather than random social media clips. Paul Kirtley’s tutorials on feather sticks and knife control, videos on safe batoning from seasoned instructors, and field sharpening demos from gear experts like REI or trusted knife makers can show the right way to work without damaging your blade.
A knife is more than steel, it’s fire, shelter, food, safety, and a last line of defense. But it’s only as good as the hands that use it. By learning safe grips, mastering feather sticks, batoning with control, keeping a sharp edge, and knowing basic first aid, you turn a simple blade into a true survival tool.
Make these skills routine: run the 30-minute weekly drill, check that your tetanus shots are current, and keep a small field-sharpening and first-aid kit in your pack. Confidence comes from practice long before you need it.